Documentation
Setup takes about ten minutes. Work through the sections in order. Every screenshot below is from a real WooCommerce store running GSTLayer.
On this page
1. Install
GSTLayer, the free plugin, is in review at WordPress.org. Until it is listed there, download it from this site, upload the ZIP under Plugins → Add New → Upload Plugin, and activate it. WooCommerce must already be active. If you bought Pro, upload the gstlayer-pro.zip from your purchase email as a second plugin (Plugins → Add New → Upload Plugin) and activate it too. Pro needs the free plugin version 0.2.0 or newer.
Requirements: WordPress 6.5 or newer, WooCommerce 8.9 or newer, PHP 7.4 or newer. Both plugins work with WooCommerce's High-Performance Order Storage and with the block checkout as well as the classic checkout.
2. Supplier details
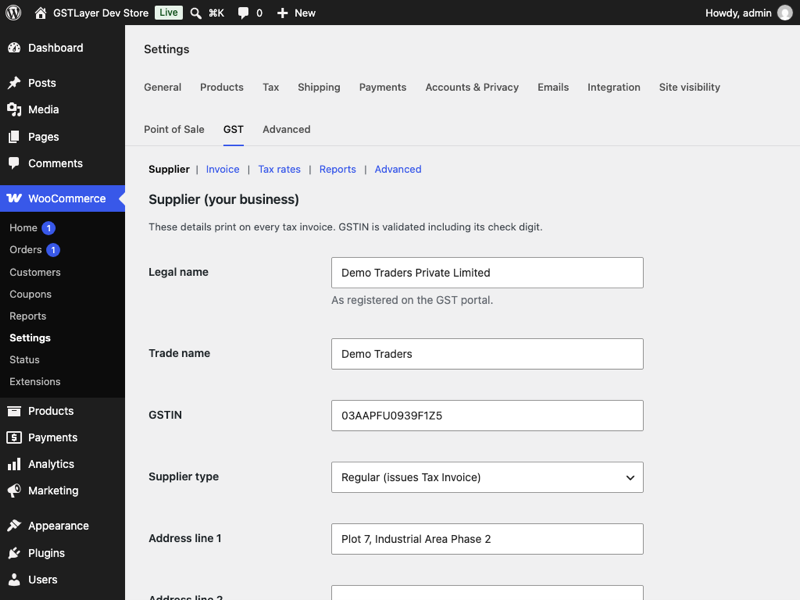
Go to WooCommerce → Settings → GST → Supplier. Enter your legal name as registered on the GST portal, trade name, GSTIN, address and State / UT. The GSTIN is validated including its check digit; a typo is rejected on save. Choose Regular or Composition scheme. Keep Place of supply basis on "Shipping address" if you sell goods; choose "Billing" only for a services-only store.
3. Tax rates
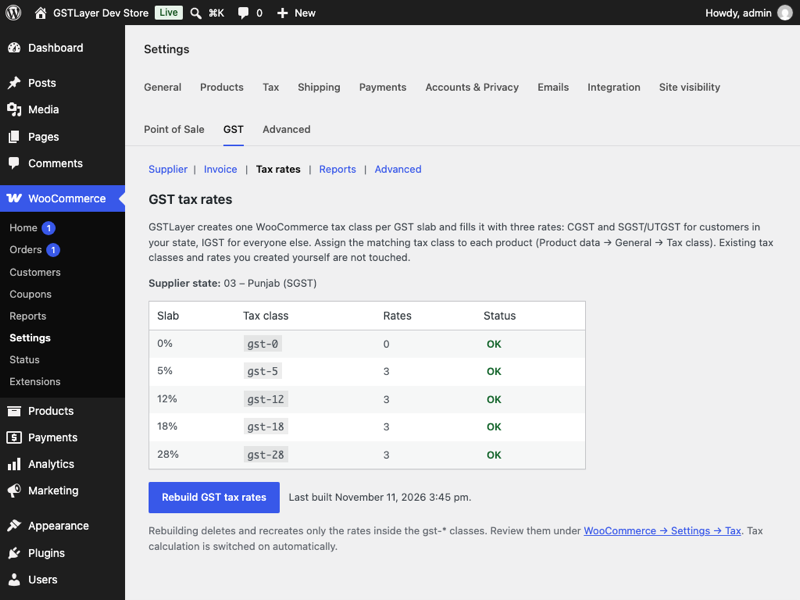
Open the Tax rates section and click Create GST tax rates. GSTLayer creates one WooCommerce tax class per slab (gst-0, gst-5, gst-12, gst-18, gst-28) and fills each with CGST + SGST (or UTGST) for customers in your state and IGST for everyone else. Your own existing tax classes are not touched. Slabs can be changed under Advanced (for example add 3 % for jewellery), then rebuild.
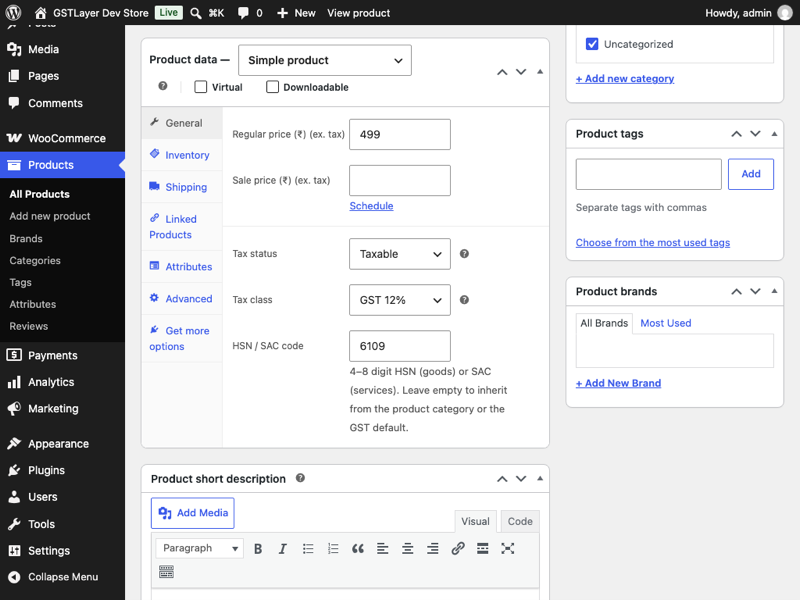
Then edit each product: Product data → General → Tax status = Taxable and Tax class = the GST slab of that product. Shipping tax follows WooCommerce's Shipping tax class setting; set it to the slab that matches most of your catalogue.
4. HSN / SAC codes
Enter the HSN (goods) or SAC (services) code in Product data → General → HSN / SAC code. Variations can carry their own code; otherwise they inherit the parent's. A code set on a product category applies to every product in it that has none of its own. Codes must have 4 to 8 digits; stores with turnover above ₹5 crore must use at least 6 digits.
5. Checkout
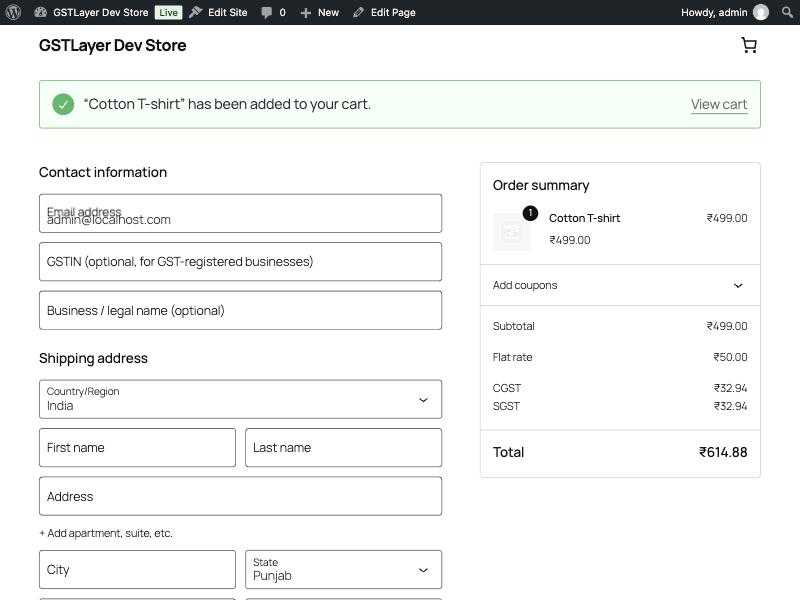
A GSTIN field and a "Business / legal name" field appear under Contact information in the Checkout block, and in the billing section of the classic checkout. Both are optional for the customer; a GSTIN that is entered is validated and must be correct. Orders with a valid GSTIN are treated as B2B and print the buyer's GSTIN and legal name on the invoice.
6. Invoices
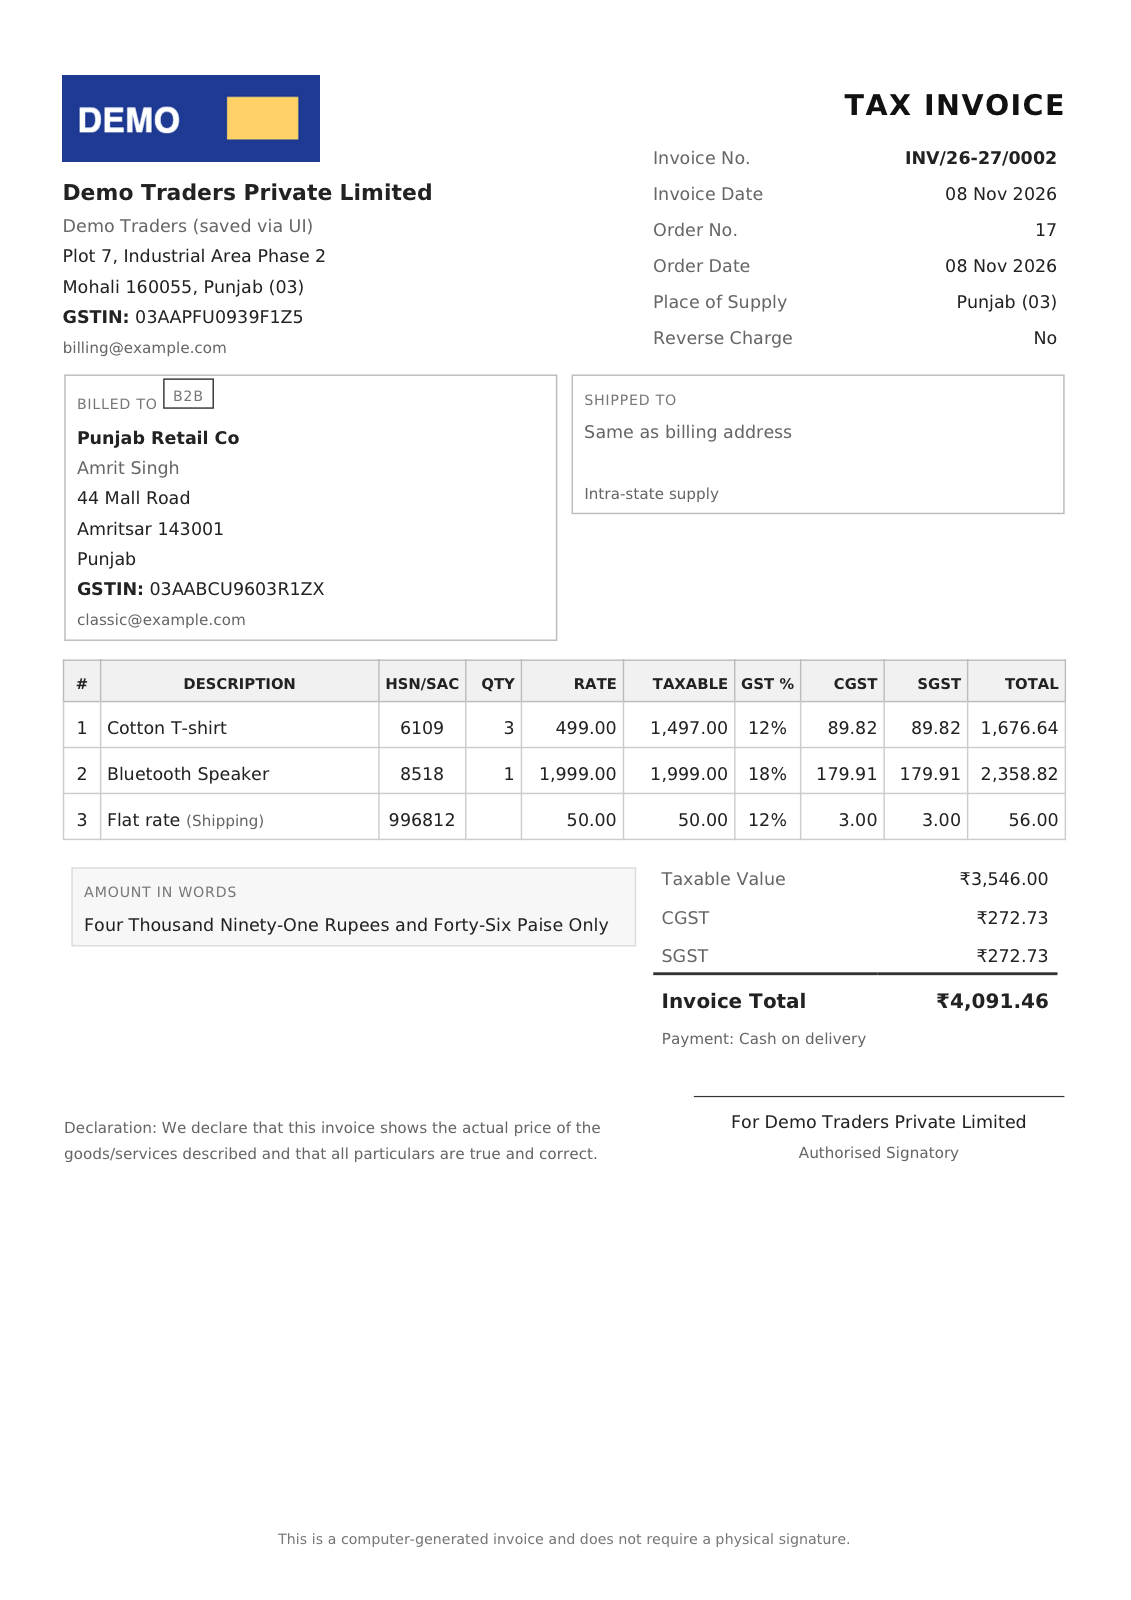
Under Settings → GST → Invoice set the prefix (default INV/{FY}/ gives INV/26-27/0001), the number padding, and which order statuses issue the invoice (default Processing and Completed). The number is assigned the first time the order reaches one of those statuses and never changes. Upload a logo if you like. Stores registered under the composition scheme get a Bill of Supply instead of a tax invoice, automatically.
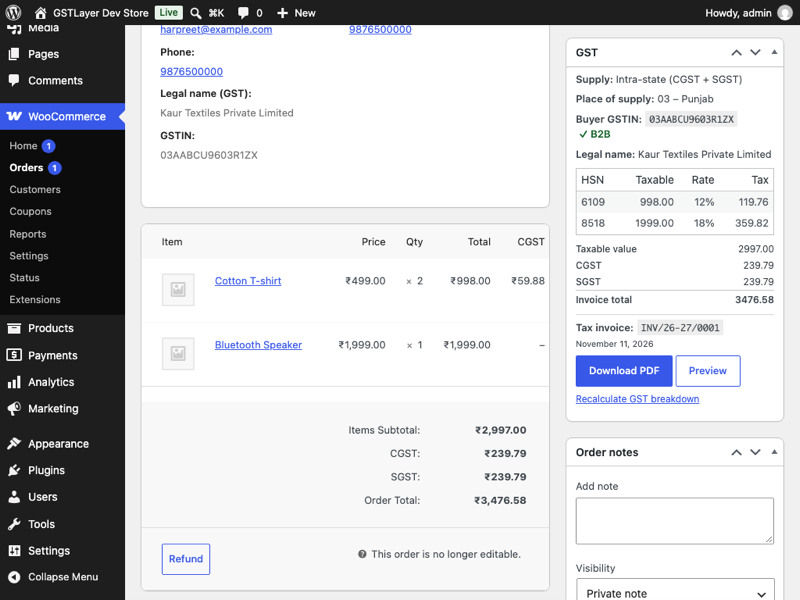
The order screen shows a GST panel with the place of supply, supply type, buyer GSTIN, HSN-wise taxable value and tax, warnings, and the invoice number with Download PDF and Preview. Customers get the PDF attached to the Processing/Completed email and can download it from the order confirmation page and My Account → Orders.
7. HSN summary (free)
Settings → GST → Reports shows outward supplies for a date range grouped by HSN and rate, matching the HSN sheet of GSTR-1, with a CSV export.
8. Pro: licence and updates
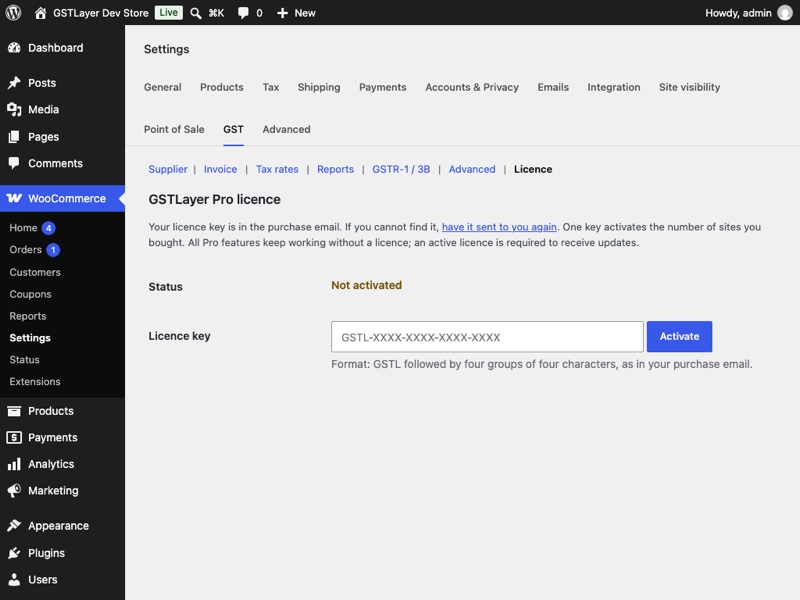
Go to Settings → GST → Licence, paste the key from your purchase email and click Activate. Each key allows the number of sites you bought; click Deactivate on this site on an old site to free a seat. All Pro features work without a licence; an active licence is needed to receive updates.
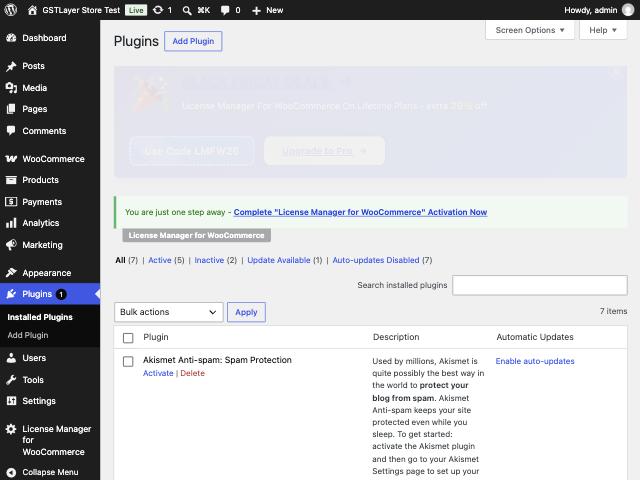
Updates arrive like any other plugin: WordPress checks for a new Pro version about twice a day, shows the usual "There is a new version available" notice under the plugin, and update now installs it. Click Check for updates in the plugin row to check immediately. The plugin only ever sends your licence key, a per-site token, your site URL and the plugin version to the update server; no order or customer data leaves your site.
Lost the key? Use Resend my key with the email you bought with. Renewal: a licence covers updates and support for one year from purchase; the plugin keeps working afterwards. Buy again for another year.
9. Pro: credit notes
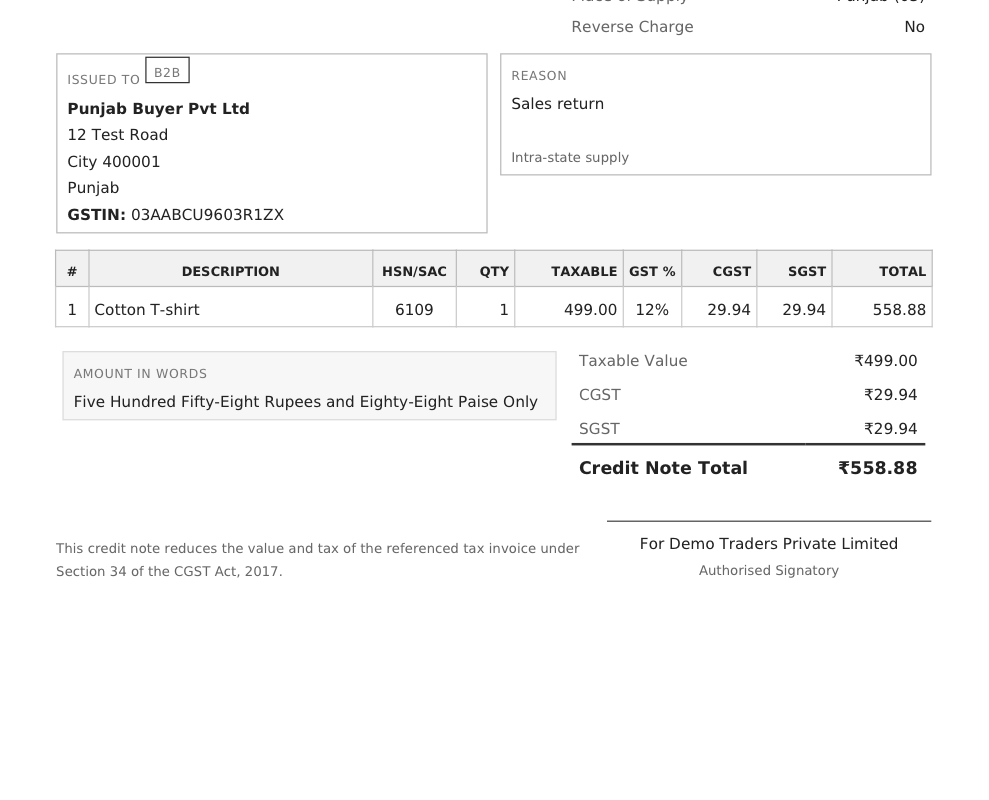
When you record a refund on an invoiced order (Order → Refund, choose the items), a credit note is issued against the invoice in its own series (default CN/{FY}/), with the GST split of the refunded items. It appears in the order's GST panel, is attached to the refund email and is downloadable in My Account. Refund the specific items rather than an amount so the GST split is exact.
10. Pro: GSTR-1 and GSTR-3B
Settings → GST → GSTR-1 / 3B: pick the return period and download the section CSVs or the ZIP. Check the warnings list first: missing HSN codes, rates the tool does not accept and export invoices needing shipping-bill details are listed there. The GSTR-3B table shows outward supplies net of credit notes; purchases and input tax credit are not part of GSTLayer.
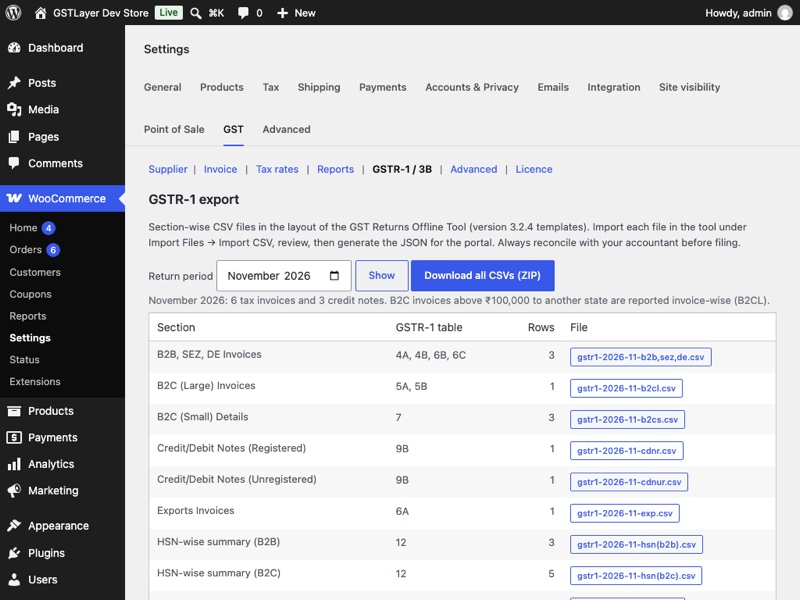
Rules applied: inter-state B2C invoices above ₹1,00,000 are reported invoice-wise (B2C Large) for periods from August 2024; the HSN summary is split into B2B and B2C from the April 2025 tax period; credit notes against B2C Small invoices are netted into Table 7. Dates use the offline tool's dd-Mon-yy format and places of supply its "code-State" format. Confirm your filing with your chartered accountant.
11. Importing into the GST Offline Tool
The CSV files follow the templates that ship with the GST Returns Offline Tool (version 3.2.4), which you download free from the GST portal. The exact menu labels depend on the tool version you have installed.
- Download the ZIP for the period from GSTLayer and unzip it.
- Open the Returns Offline Tool, start a new GSTR-1 for your GSTIN, financial year and tax period.
- Use the tool's Import CSV option. Pick a section (for example "B2B, SEZ, DE Invoices"), select the matching GSTLayer file (
gstr1-YYYY-MM-b2b,sez,de.csv) and import. Repeat for each section that has rows; skip files GSTLayer marked "nothing to report". - If the tool reports an error on a row, fix the cause in WooCommerce (usually a missing HSN code or an unexpected rate), download the CSV again and re-import that section.
- Review the tool's summary and compare the totals with the GSTR-3B table in GSTLayer, then generate the JSON file and upload it under Returns on the GST portal.
GSTLayer prepares the sales side only. Purchases, input tax credit, reverse-charge inward supplies, advances and amendments to earlier periods are entered from your other records.
12. Questions and answers
Does the plugin send my data anywhere? No. Tax calculation, PDFs and reports are generated on your own server. The free plugin makes no network requests at all. Pro contacts the licence server only to activate, check or deactivate the licence and to look for updates.
What about orders placed before I installed GSTLayer? Their tax lines were calculated by whatever rates existed at the time, and GSTLayer reports them as they were charged. Invoices are issued only for orders that reach an issuing status after installation.
Can I change an invoice number? No. Numbers are sequential and permanent, as the GST rules require. Cancel the order and issue a credit note if something was wrong.
How many sites does a licence cover? Pro – 1 site covers one production site; Pro – 5 sites covers five. A staging copy of your store counts as a site, so deactivate the licence on it when you are done.
What happens when the licence expires? Every feature keeps working. You stop receiving updates until you buy again.
Refunds? Fourteen days from purchase, no questions asked. See the refund policy.
Is GSTLayer a substitute for an accountant? No. It prepares the sales data in the right shape; the filing and the final figures remain your and your chartered accountant's responsibility.
13. Troubleshooting
"Invalid GSTIN" when saving supplier details. The check digit does not match. Copy the GSTIN from your registration certificate rather than typing it; the last character is a check digit computed from the other fourteen, so a single wrong character is caught.
No invoice on an order. Invoices are issued when the order reaches an issuing status (Processing or Completed by default). Check Settings → GST → Invoice, then change the order status; the GST panel on the order shows the result and any warning.
Tax shows as 0 at checkout. The product's tax class is not one of the GST slabs, or WooCommerce → Settings → Tax → "Enable taxes" is off, or the customer's address has no state. Check all three.
IGST charged to a customer in my own state. The place of supply follows the shipping address by default. If the store sells services, switch Place of supply basis to "Billing" under Supplier.
The offline tool rejects a CSV. Open the warnings list on the GSTR-1 / 3B screen for the same period; it names the orders with missing HSN codes or unsupported rates. Fix, re-download, re-import.
"Could not reach the licence server." Your host blocks outgoing HTTPS requests, or a security plugin does. Allow requests to gstlayer-store.creative-solution-dev-site.workers.dev and click Check now. A licence that was active stays usable for 14 days while the server cannot be reached.
Still stuck? Pro customers: see Contact. Free plugin: write to us through Contact until its WordPress.org support forum opens.
14. Uninstalling
Deleting the plugin keeps all data, because invoices are legal records. Tick Remove all GSTLayer data under Settings → GST → Advanced before deleting if you really want everything removed.